Submitting Documents for E-Signing
Landlord Vision integrates with Signable to allow you to have your documents signed electronically, rather than putting pen to paper. Doing this can potentially save you days of paper chasing and streamline your processes, not to mention it is cheaper than first class stamps.
Please see the following article about the legalities of E-Signing
https://www.signable.co.uk/legal
What you can sign electronically
You can use any PDF or Word document(s) stored in Landlord Vision, whether this was created in Legal Documents, Mail Merge or just something you have created yourself and uploaded. Here is the list of document locations:
Contacts > select the contact > Contact Documents
Property Manager > Properties > select the property > Property Documents
Tenant Manager > Tenants > select the tenant > Tenant Documents
Tenant Manager > Tenancies > select the tenancy > Tenancy Documents
Document Manager > Documents
Creating Envelopes
Each of the above screens has an E-Signatures tab which in turn has a Create Envelope button. An Envelope is simply a collection of documents that can be sent to one or more people at once.
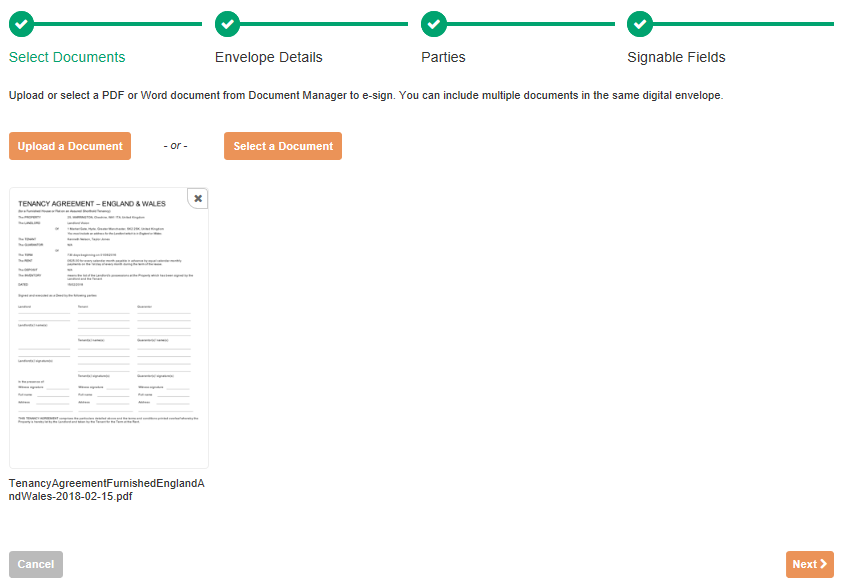
Firstly Select your documents. You can pick a document off one of the above screens or select as many as you need from the Create Envelope screen. Click Next.
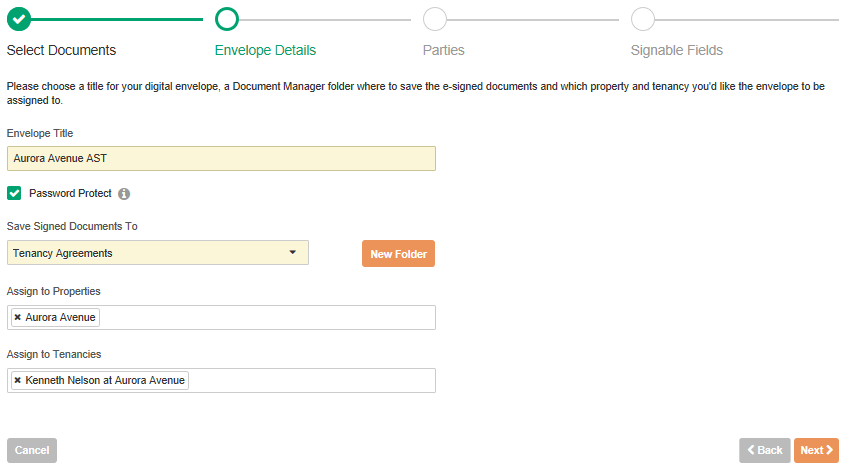
On the Envelope Details screen, give the envelope a Title, enable Password Protect, and choose a folder where you want the Saved Signed Documents to go once they are complete. Create a new one if necessary. Then assign the document to a Tenancy and a Property. This will make all of the completed documents in the envelope available in the Property and Tenancy Documents screens once they have been signed.
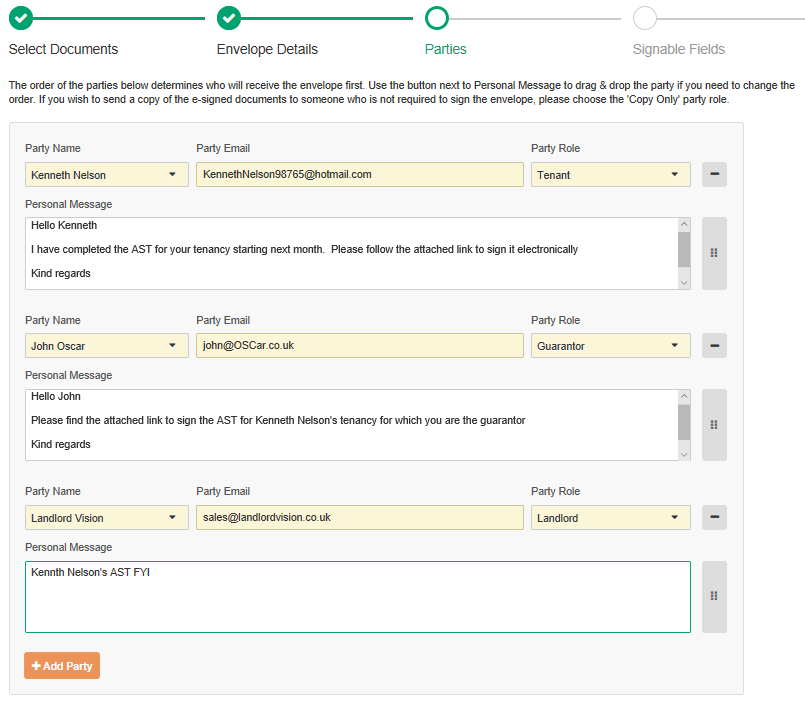
On the Parties screen, choose who will be signing the document, what their email address is and what their role is. A role might be a Tenant, or the landlord or even someone you just need to copy on the document so they have their own version of it. You can add a Personal Message to send in the email with the envelope to each party. The envelope will be sent out in the order that you set them here. Once the first person has signed it, then the second person will receive it. You can change this order by moving the slider with the six dots on it next to the Personal Message.
Don't forget to add yourself as a party if you need to sign the document or if you want to receive a copy of it when it is complete.
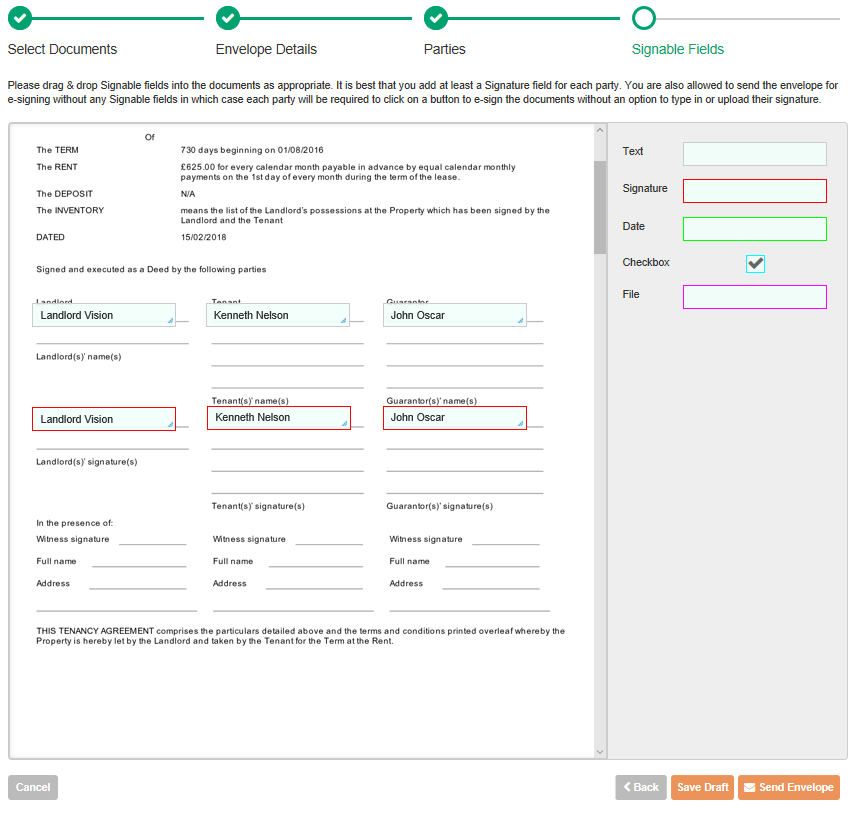
Finally, on the Signable Fields screen, place names and places where signatures will appear in the relevant positions on the document.
Grey Boxes are people's names
Red boxes are signatures
Green boxes are dates
Blue Boxes are check boxes
Pink Boxes are files
You can change the person that the box is assigned to when they are created and also afterwards by clicking on them. You can remove them on this screen too.
You do not need to enter anything for the Field Name and you can also determine whether an entered field is required to be filled in or not.
Please note that the signatures are also automatically dated so the 'Date' field will be redundant in most cases.
It takes some trial and error to align the Signable fields properly against the corresponding document field titles. For best results, we recommend that you bottom align the Signable fields against the corresponding field titles or slightly move the Signable fields below the bottom of the field titles. The Signable fields may not appear in exactly the same position on the document preview in Signable, however, they should be properly aligned on the final e-signed documents if you follow our recommendation.
Now that you have completed the document you can press Save Draft so that you can work on other documents or Send Envelope if you are happy you have everything set up correctly. Please note that pressing Send Envelope will use up one of your Signable Envelopes. If you have no envelopes, you will need to purchase some using the Buy Signable Envelopes button at the top of any E-Signatures screen. Please click here for more detail.
Customer support service by UserEcho